n8n Integration
Overview
n8n is a powerful low-code platform for building custom AI workflows and agents with an intuitive visual interface. It enables you to create sophisticated AI applications without extensive programming knowledge.
Key Features
- Visual Workflow Editor: Drag-and-drop interface for creating custom workflows
- Extensive Node Library: Large collection of pre-built nodes for popular services and apps, including relaxAI
- Custom Node Support: Create highly customizable operations for your workflow
- Multi-Trigger Support: Trigger workflows from various sources, such as webhooks, schedules, and manual triggers
- Error Handling and Logging: Built-in features for managing errors and tracking workflow execution
Use Cases
- Streamlining data workflows between databases and applications
- Automating backend tasks for web applications and APIs
- Integrating CRM systems with marketing automation tools
- Processing customer feedback with chatbots or AI assistants
Note: If you would like to customise and control your own n8n environment, you can self host your own n8n application on Civo cloud. Please find the source code and deployment instructions in the Civo Learn Git project.
Setup Instructions
1. Sign up for n8n
Sign into your n8n account or register for a free trial.
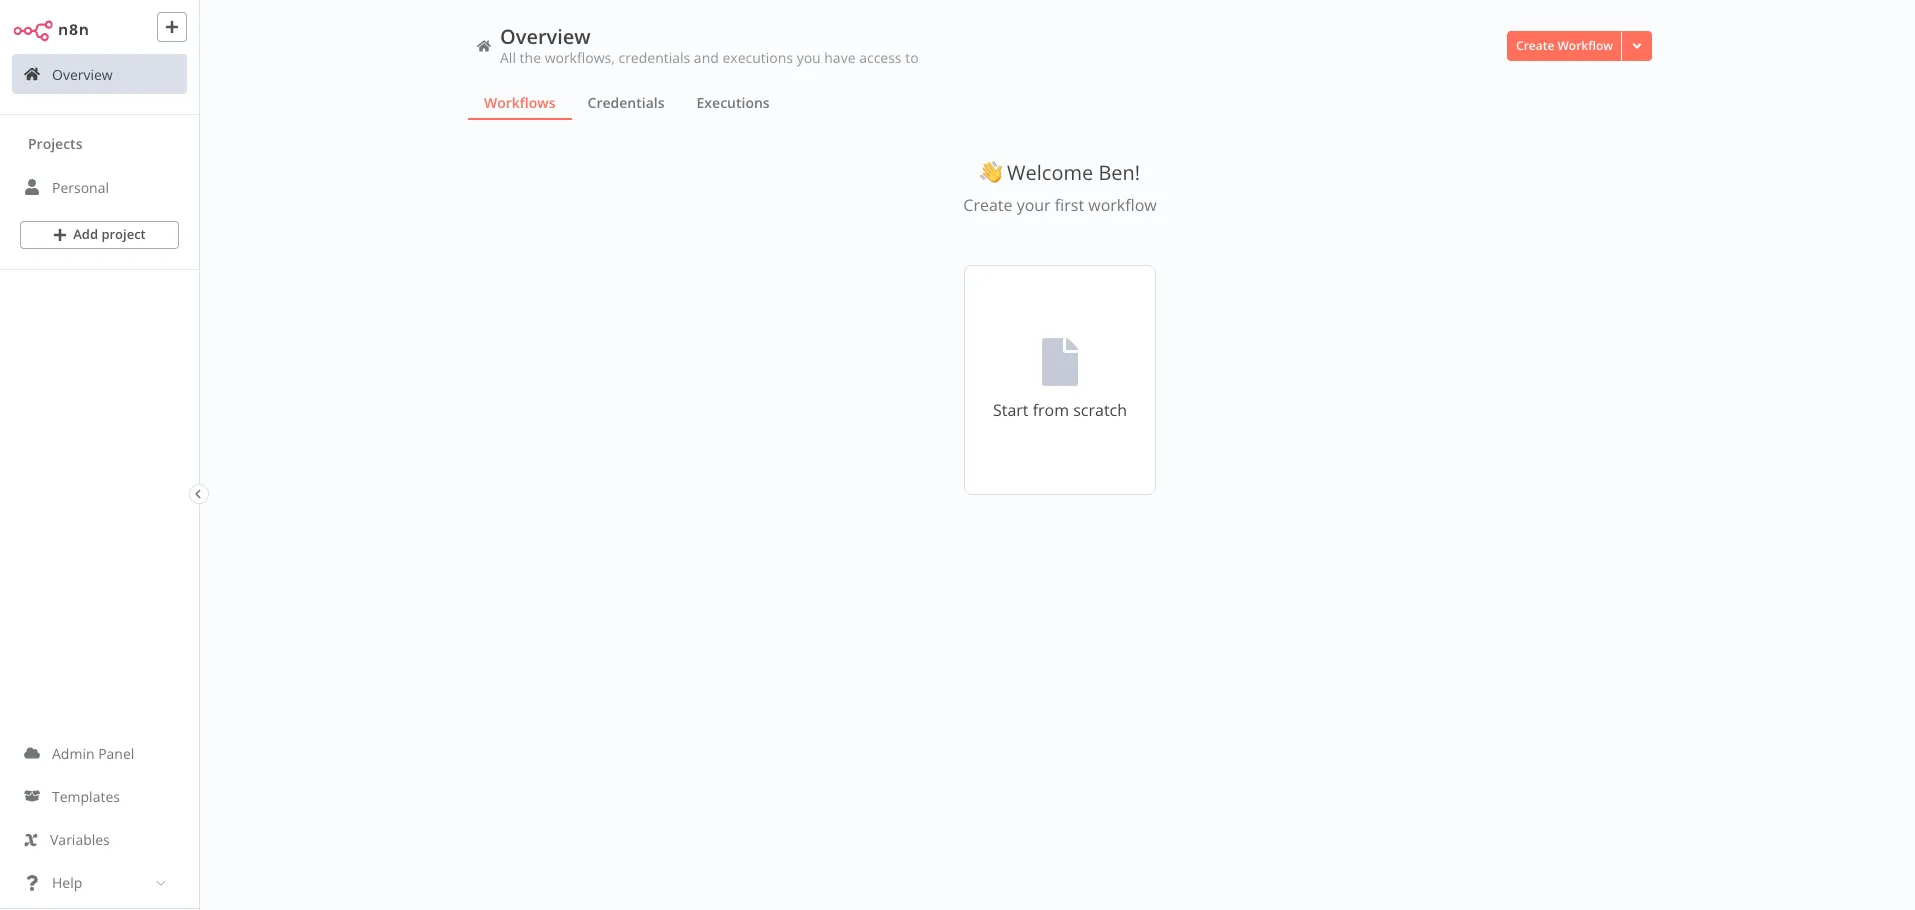
2. Access your n8n workflow dashboard
Once you have signed up, you will be taken to the n8n workflow overview page, where you can manage your workflows, credentials, and execution history.
3. Create credentials for relaxAI
Click on “Credentials” and “Add first credential.”

Then choose OpenAI in the subsequent dropdown.
An OpenAI credentials window will appear. Edit the Credential name in the top-left of the window and enter the following relaxAI API details:
- API Key:
<RELAX_API_KEY> - Base URL:
https://api.relax.ai/v1/
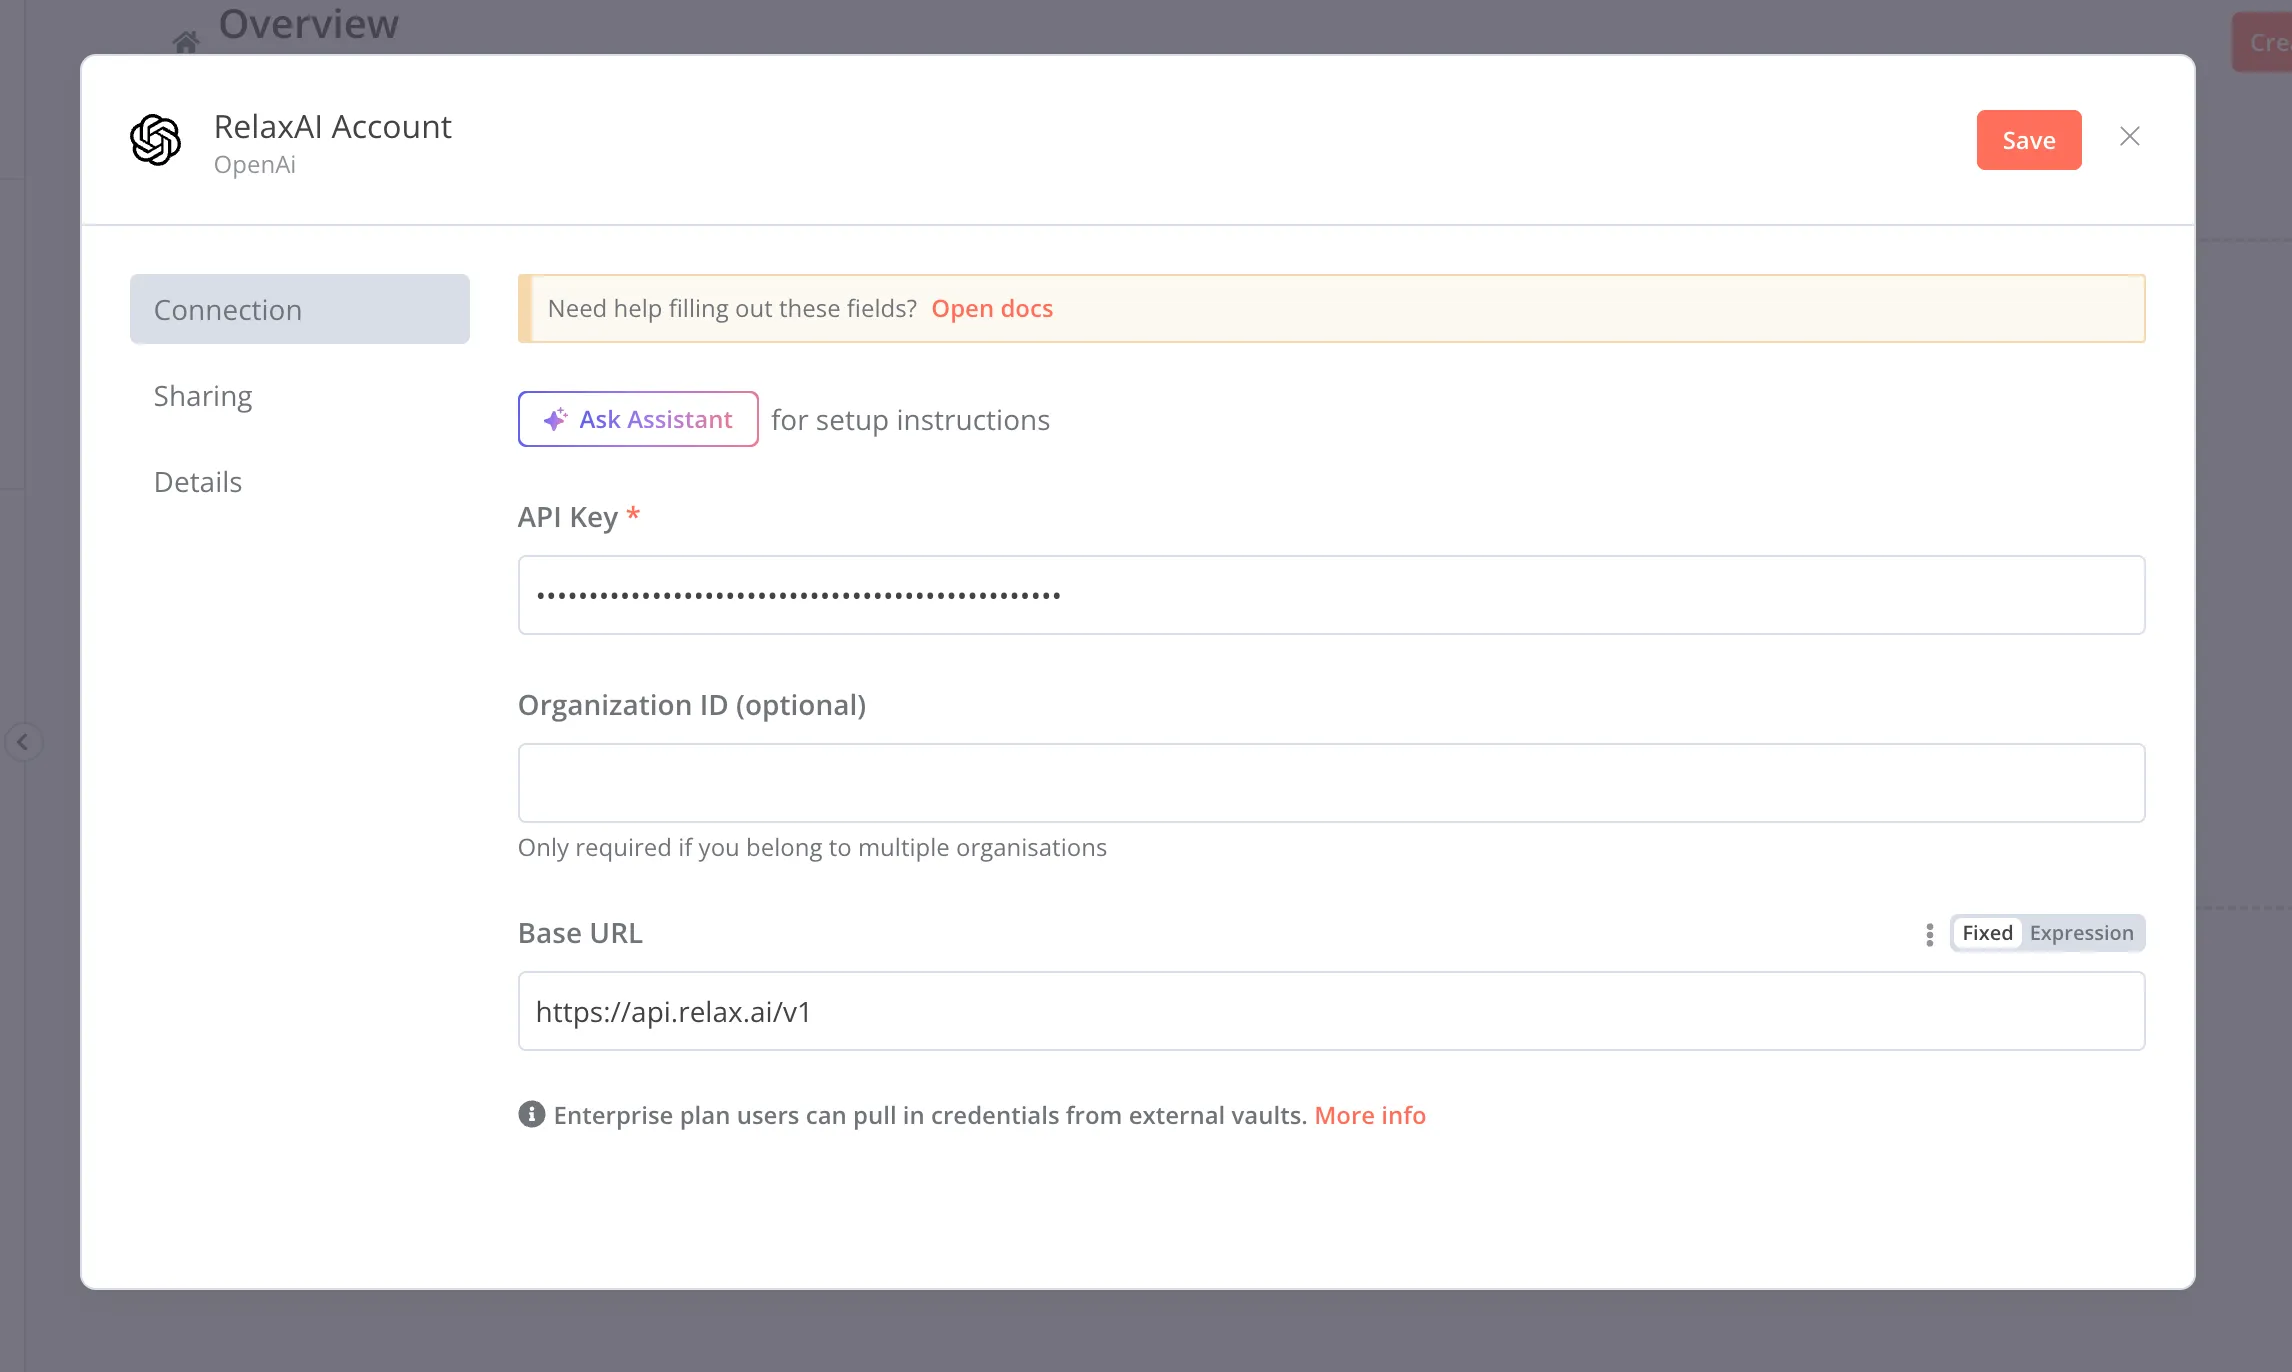
Click Save, and you will see your new relaxAI credential has been created.
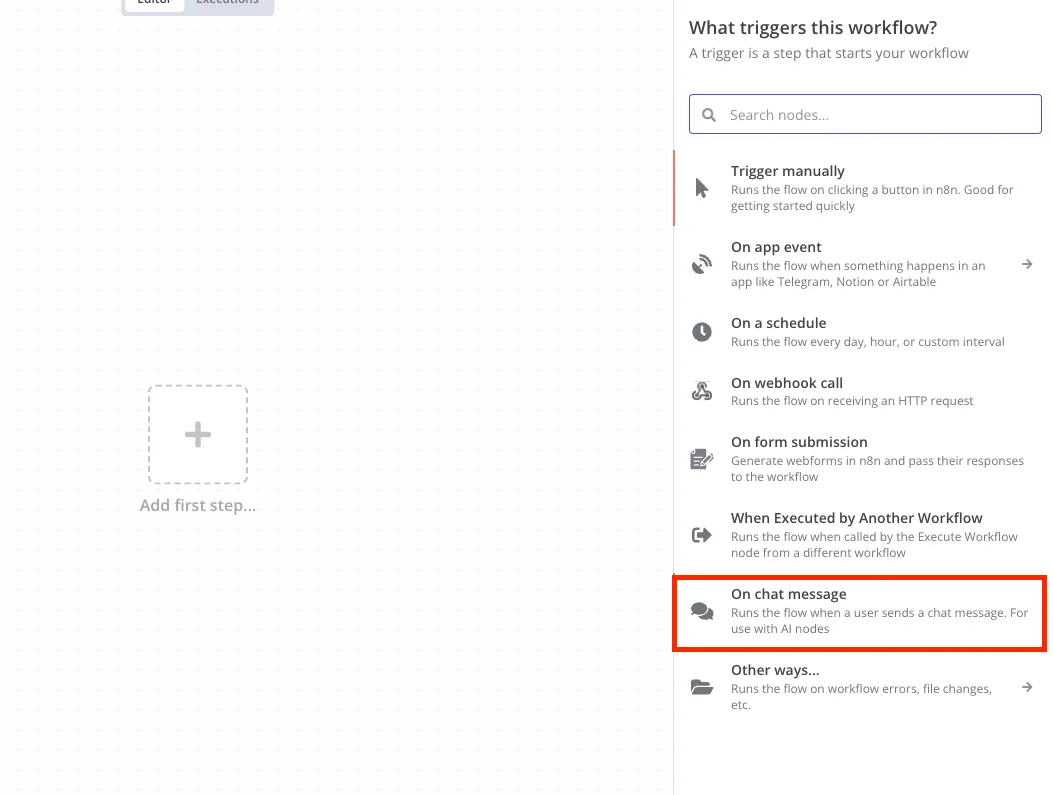
4. Add Trigger to workflow
Go back to the Workflow overview page. Either create a new workflow or select one you have already created. Add a new step and select the “On chat message” option in the “What triggers this workflow?” popup box.
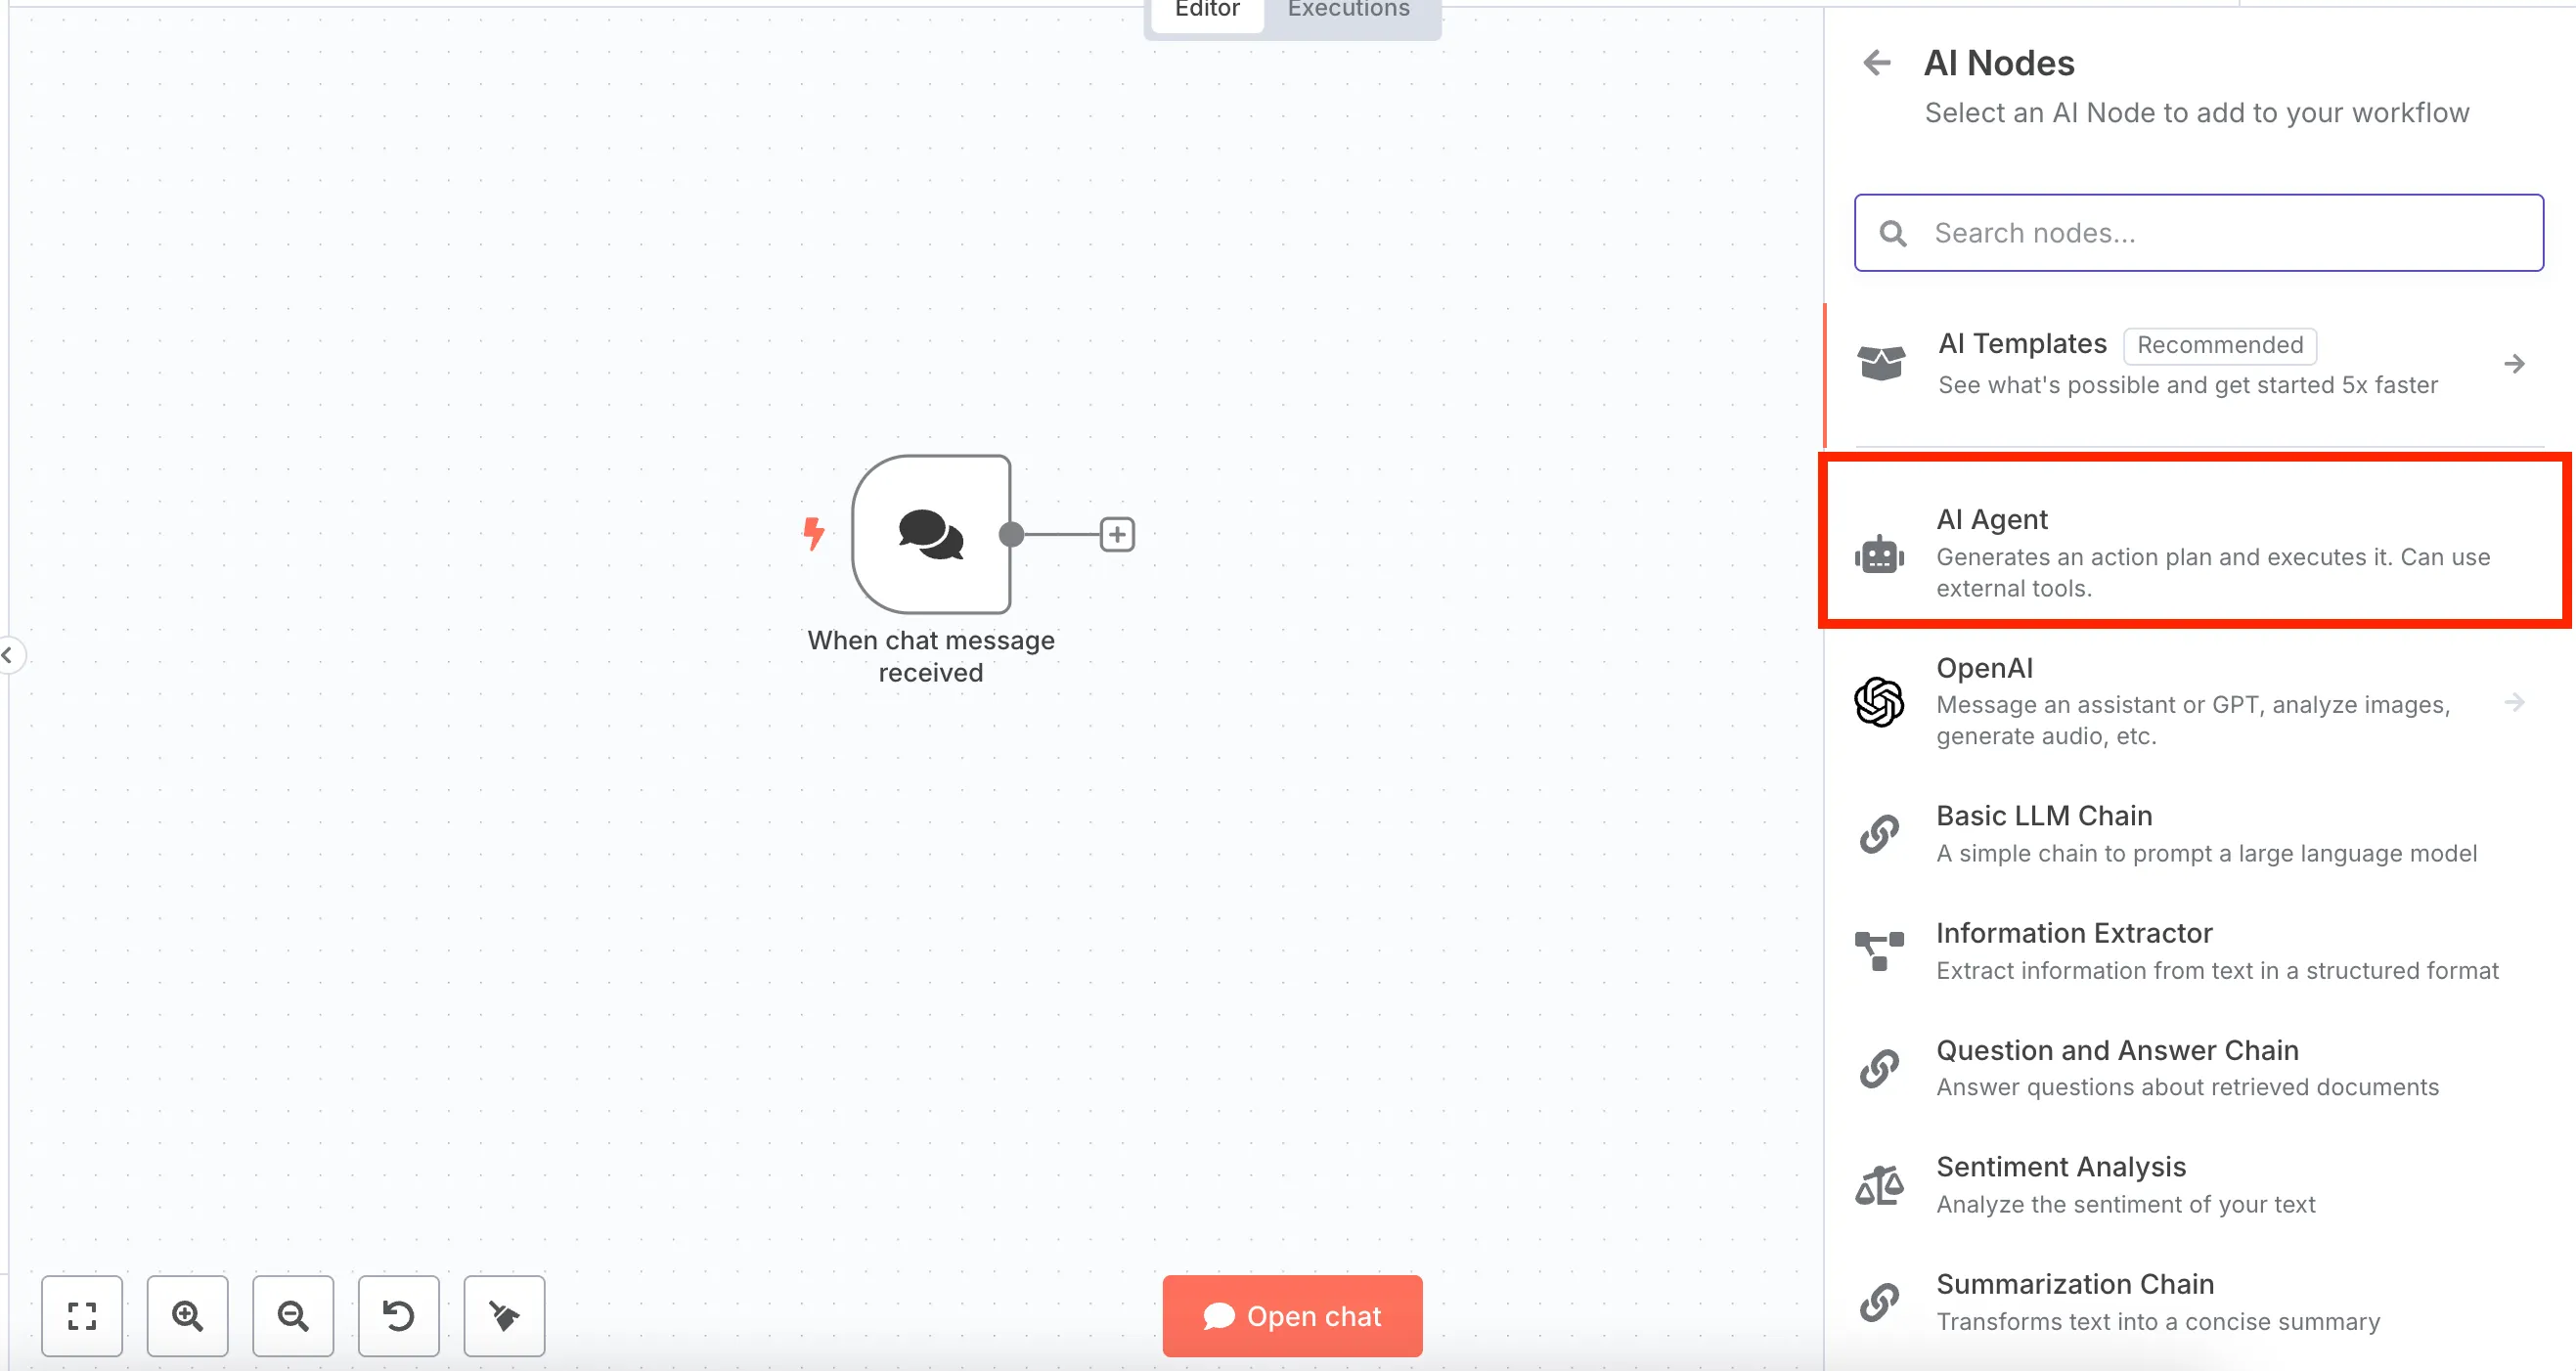
5. Add Action to workflow
Add a new Action node to your workflow by clicking the + symbol. In the “What happens next?” popup, choose “AI”, then choose “AI Agent”.
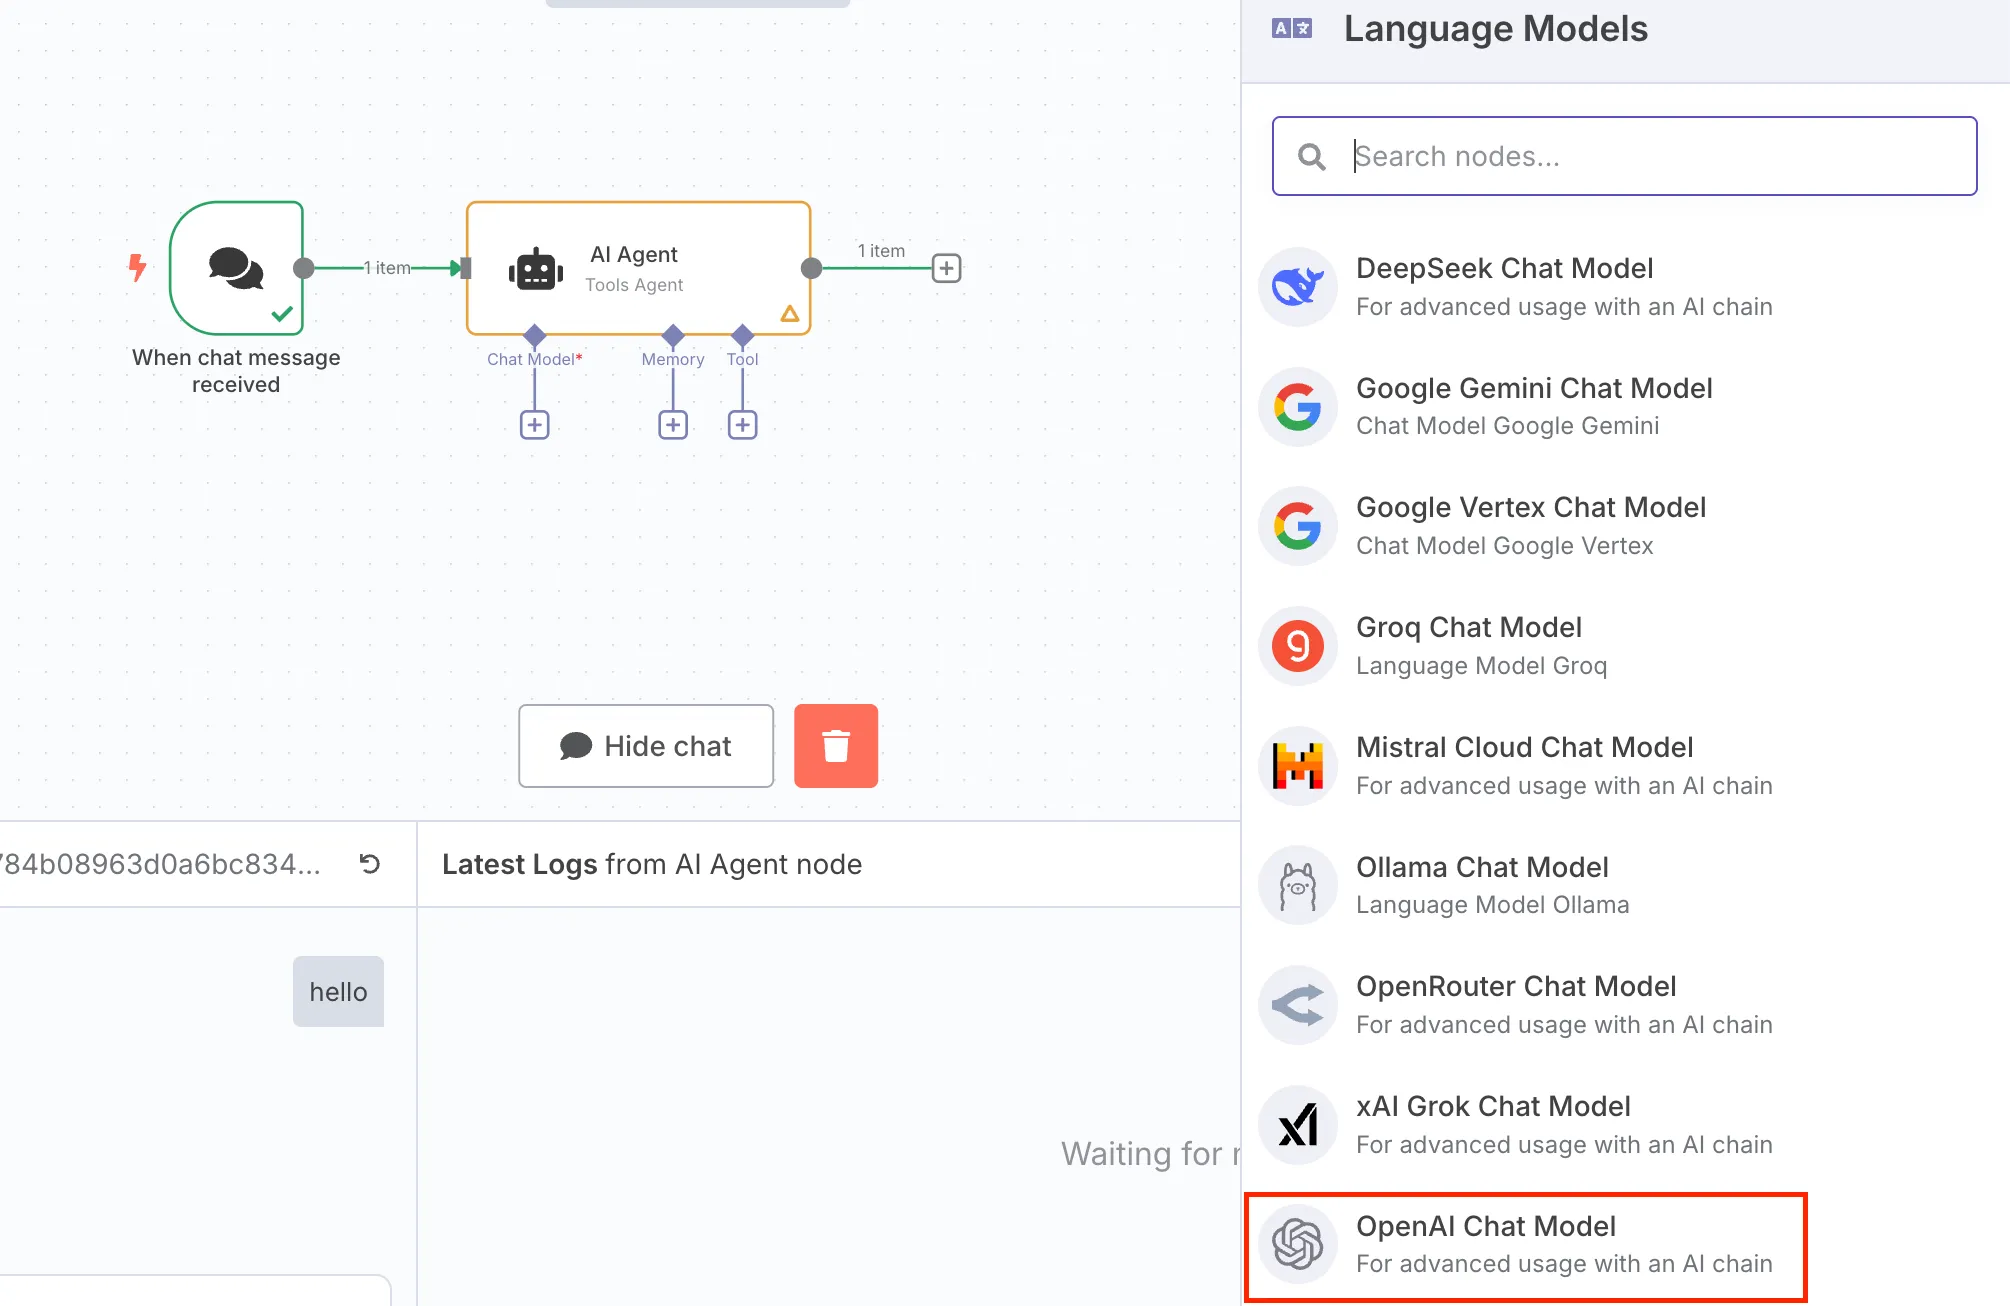
Add a new Chat Model by clicking the + symbol linked to the AI agent node. Then choose “OpenAI Chat Model” from the subsequent list of language model.
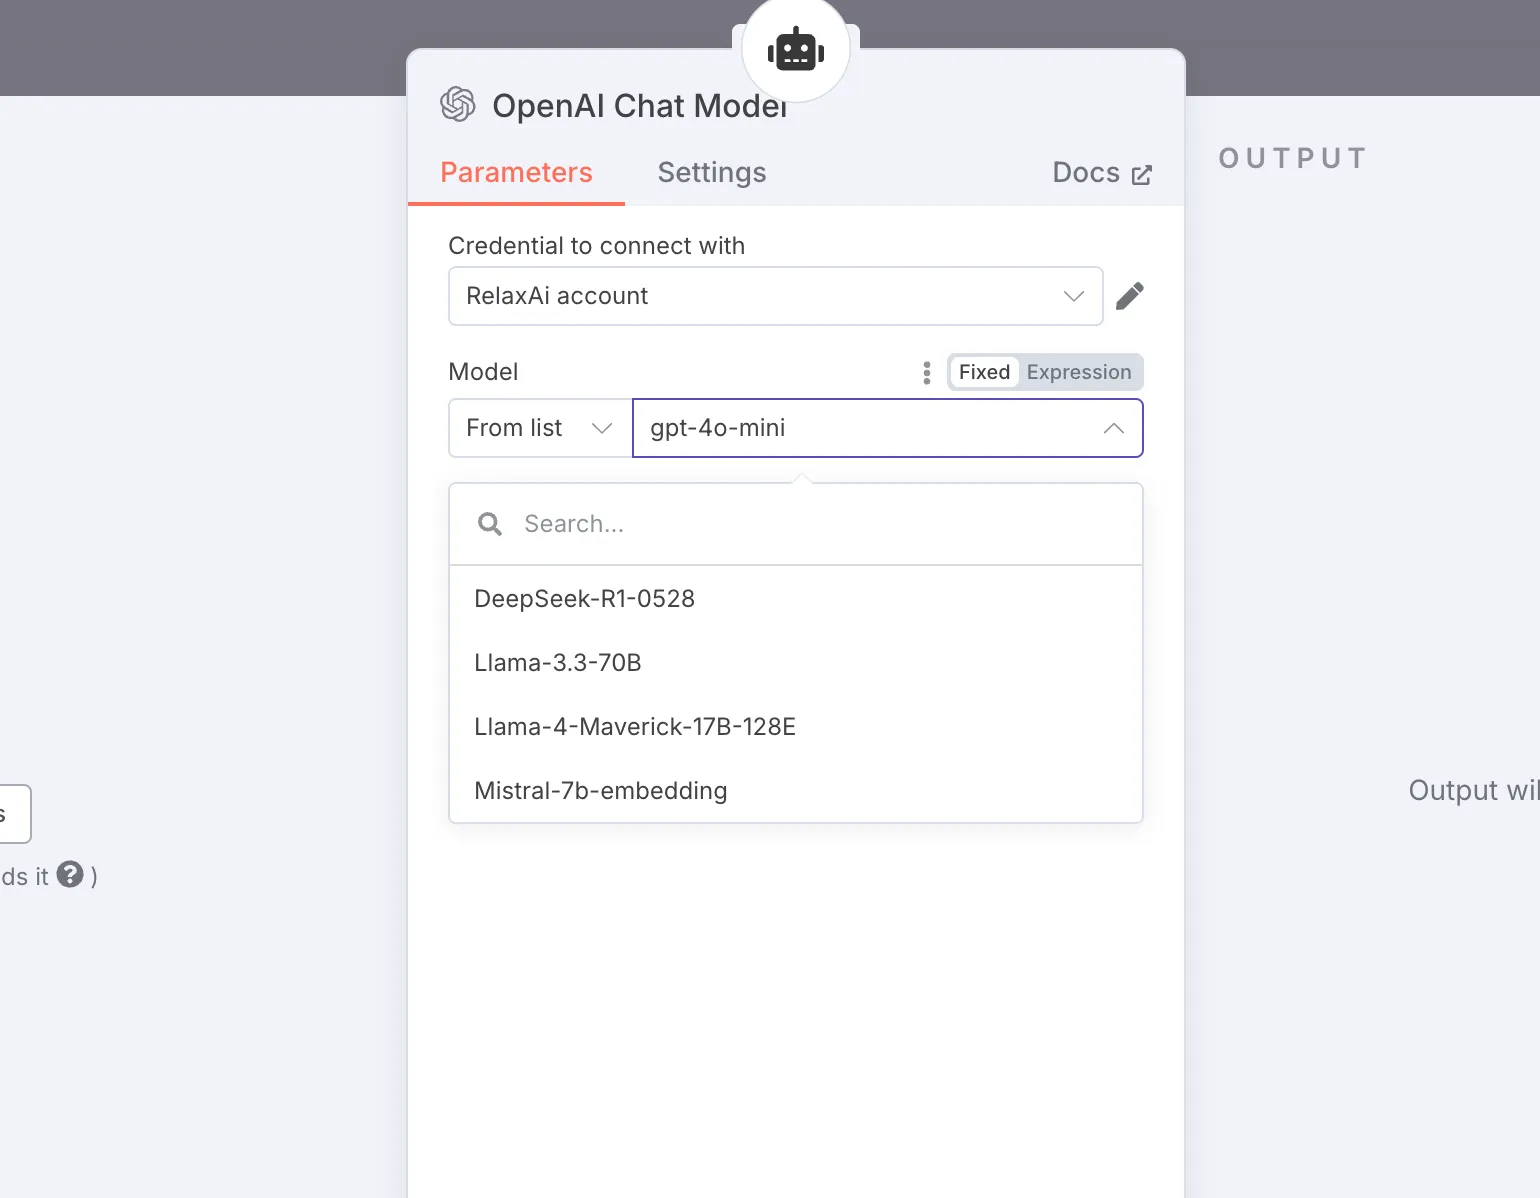
In the following popup, enter the following parameters for your model:
- Credential to connect with:
<YOUR_RELAX_CREDENTIAL> - Resource:
Text - Operation:
Message a Model - Model:
Llama-4-Maverick-17B-128E | DeepSeek-R1-0528 - Messages:
Enter prompt for the model
6. Testing the relaxAI model
Finally, you can test the model by clicking on the OpenAI step in your workflow and clicking “Test step” in the top-right of your window.